ABOUT THIS BLOG

"A Faithful Attempt" is designed to showcase a variety of K-12 art lessons, the work of my art students, as well as other art-related topics. Projects shown are my take on other art teacher's lessons, lessons found in books or else designed by myself.
Thanks for visiting!
LAND ACKNOWLEDGEMENT I acknowledge, with deep respect, that I am gathered on Treaty 7 territory. I acknowledge the many First Nations, Métis and Inuit whose footsteps have marked these lands for generations. I recognize the land as an act of reconciliation and gratitude to those whose territory we reside on or are visiting.

Saturday, May 30, 2015

African Animals paintings


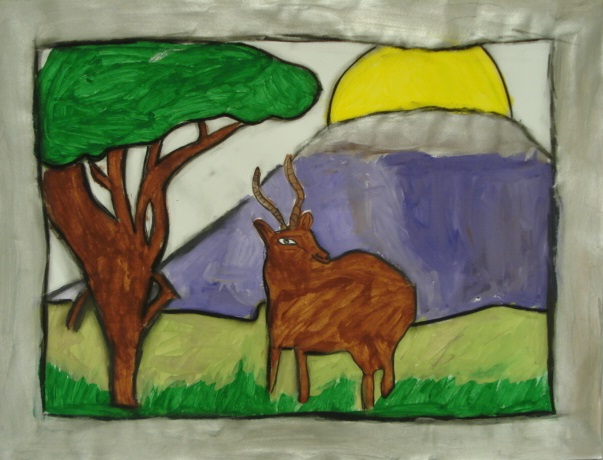
This was a painting project one of my mixed elective classes (Grade 4-6) recently finished.
Each student chose an African animal to draw. They could draw the whole body or simply a close-up portrait. On large heavy white paper, they measured a thick border (about 1.5 inches) using a ruler. 
I encouraged them to design a simple border. I had handouts with African patterns on them to help inspire. 


Once the border was designed, they drew their animal inside.


They used tempera tp paint these. It took quite a few classes due to the large format. 


Sometimes it's easier to work on the floor!


Once everything was painted and dry, students used a charcoal pencil to trace over all the lines and used a finger to smudge out the line. This added some soft texture and contrast.


Like I said, these took quite a while to complete, but we were all happy with the final result. 
I displayed these on easels at out school's musical production of "The Lion King". 


Sunday, May 24, 2015

Textural Spring Blossom Trees


This project was inspired by a art project one of my Grade 2 students gave to me. She made a charming tree with the tree trunk made from a toilet paper tube. Hers was a summer tree (green tissue paper) so we simply altered our to be Spring trees. 
This is a great lesson to reinforce the art elements of texture and form.

First off, draw some grass at the bottom of some background paper.  Use heavy paper- cardstock if possible; I ran out of light blue paper completely so ran to the office and grabbed light blue copy paper, thinking it would work fine. It was simply too thin for the project, so yeah, I strongly recommend at least construction paper or heavier :)

Grab a toilet paper tube- flatten it, and on one of the sides, cut out a little hole. Re-flatten and glue onto the background grass paper. We used white glue for strength and I had the students sit on their tree trunks for a couple of minutes to really make them stick!


Then, fill in the top of the tree with scrunched up bits of tissue paper. I set out a whole bunch of 'spring blossom' type colours.


Once the tree is filled in, students drew accessories (sun, clouds, flowers, etc) using markers, pencil crayons. oil pastels, and/or chalk pastels. We also glued on some sequins to add some sparkle to the trees. Students also added a little animal inside the hidey-hole in the tree.


Wednesday, May 6, 2015

Plasticine Pictures


This art project was inspired by one of my favourite Canadian illustrators, Barbara Reid
I own quite a few of her books and love her charming illustrations made entirely out of plasticine (aka: modelling clay).


This project requires minimal materials:
small paper plates 
 (I bought thin cheapo ones from the Dollar store and they worked great.)
plasticine 
(I tried a few different brands and found I liked Prang brand the best as it was the softest).
You want a variety of colours including lots of greens and blues.
Before class, I cut the blocks of plasticine down into small chunks/slices which are more easily distributed to students. 
placemats to protect tables/desks 
(I just used sheets of construction paper)


My Grade 1 students used the theme "farm animals" as they studied that with their class teachers as part of their regular curriculum. So we made farm animal landscapes.

They create a simple background first- smear blue and green plasticine in a thin layer onto the paper plate to create the sky and grass. It might take some time for the students to soften the plasticine in their hands first. They can mix colours to get any shade they want.


Using balls of plasticine pressed onto the background, create clouds and a sun and whatever 
else they want in the sky.


Then they can start adding their animals and plants/accessories.
They really enjoyed this project!!


Grade 1 results- too cute


this horse has a cowboy on it!!!


Related Posts Plugin for WordPress, Blogger...